Why a crochet blanket for beginners is the friendliest first big project
A crochet blanket for beginners is the rare large project that asks almost nothing of you beyond patience. It is one stitch repeated until the piece is big enough. There is no shaping, no sleeves to set in, no fit to get right, and nobody has to be able to wear it. You pick a stitch, you work back and forth in straight rows, and you stop the moment it covers a lap or a crib. That is the whole shape of the thing.
This guide walks you through making an easy crochet blanket from the first chain to the last woven end. You will learn which stitch is kindest to a beginner, exactly what to buy, how big to make a first blanket so it actually finishes, the one trick that keeps your edges straight, and the handful of mistakes everyone makes early. If you have never held a hook at all, start with our calm guide to crochet for beginners and come back here once a slip knot feels familiar.
We will keep it unhurried. A blanket is a long, quiet project, and that is exactly what makes it forgiving.
What you need to start
The supply list for a simple crochet blanket is short, and most of the cost is yarn. You do not need a kit. Here is the honest version.
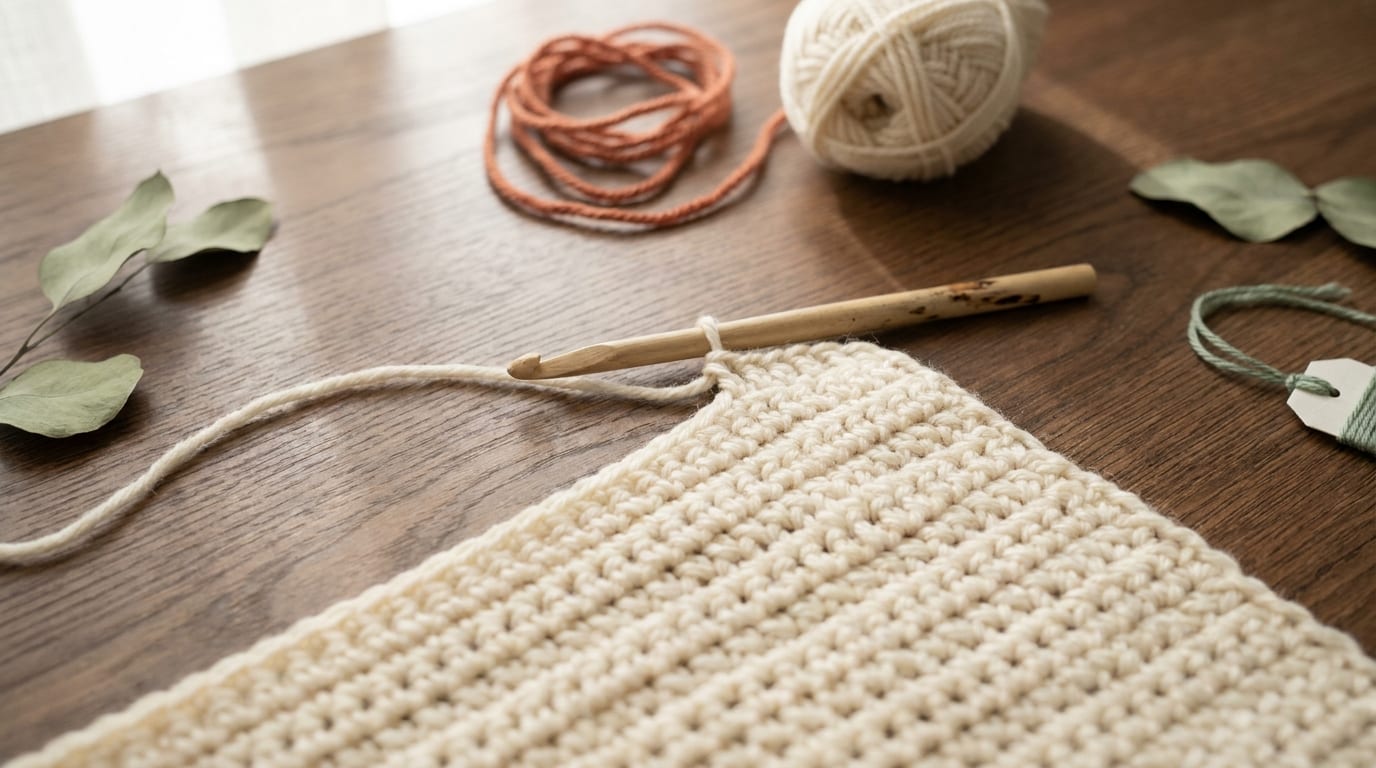
- One hook, 5.0 to 5.5 mm (US H to I). This range pairs cleanly with the worsted yarn below and makes a fabric that is dense enough to feel like a blanket without being stiff. The 5.5 mm gives a slightly softer, faster result, which most beginners prefer for a throw. Aluminum and wood both work. Pick whichever feels nicer in your hand, because you will hold it for hours.
- Smooth worsted yarn (UK aran) in a light, solid color. Worsted weight is the sweet spot for a first blanket: thick enough to grow quickly, thin enough to handle easily. Choose a smooth acrylic in cream, oatmeal, or a soft sage. A solid pale color shows every stitch, which makes mistakes easy to spot and fix. Skip variegated, skip black, and skip anything fuzzy for now, because all three hide your stitches.
- A pair of scissors and a yarn needle. The blunt large-eyed needle is for weaving in your two loose ends at the finish. That is the only sewing a blanket asks of you.
Acrylic earns its place here for three reasons. It is inexpensive, which matters when a blanket needs a lot of yarn. It is soft and machine washable, which matters for something that lives on a couch. And it forgives you if you pull a section out and start over, which you will. Buy all of it at once, in a single dye lot, and we will come back to why that matters so much.
The easiest stitches for a beginner blanket
Three stitches make a genuinely easy crochet blanket. Any of them works. They differ in speed, in how the fabric feels, and in how much yarn they eat, so here is each one in plain terms with an honest recommendation at the end.
Half double crochet (hdc)
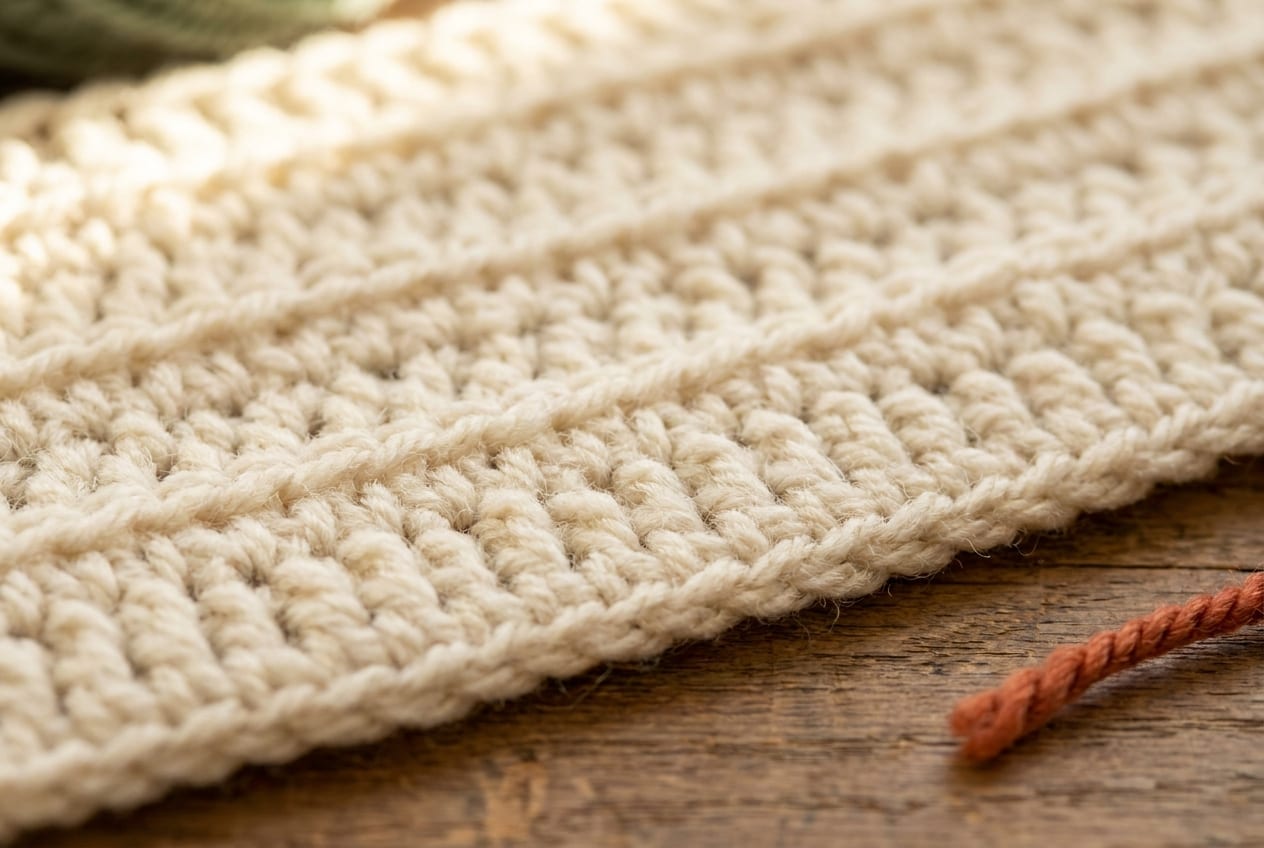
Half double crochet (hdc in US, half treble in UK) is the sweet spot for a first blanket. You yarn over, insert the hook into the next stitch, yarn over and pull up a loop so you have three loops on the hook, then yarn over once more and pull through all three at once. That single move makes a warm, slightly squishy fabric that lies fairly flat and grows noticeably faster than single crochet. It is tall enough to cover ground quickly, short enough to stay tidy, and easy to keep even.
Single crochet (sc)
Single crochet (sc in US, double crochet in UK) is the simplest stitch in crochet. Insert the hook, yarn over, pull up a loop, yarn over again, pull through both loops. It makes a sturdy, dense fabric that wears like iron. The trade-off is real, though: it is the slowest of the three and uses the most yarn for the same square inch, so a single crochet blanket takes longer and costs more. It is a fine choice if you want the simplest possible motion and do not mind the extra hours.
The granny stitch
The granny stitch is clusters of double crochet (dc in US, treble in UK) separated by small chain spaces, worked row after row. It is rhythmic, fast, and forgiving, partly because the chain spaces make it obvious where the next cluster goes, so you rarely lose your place. It is the same idea that builds a granny square, just worked straight instead of in rounds. If you like the look, the granny square blanket route reaches a blanket the same way, one motif at a time.
For most beginners, half double crochet is the stitch to start with. It balances speed, a soft feel, and flat behavior better than the other two, and it stays easy to count. If you want the full set of blanket-friendly stitches with photos, our guide to crochet blanket stitches lays them all out side by side. You can also see the step-by-step for the half double crochet stitch and the single crochet stitch on their own pages.
A simple first blanket, step by step
Once you have a stitch in mind, a blanket is almost embarrassingly simple to start. Here is the whole process from the first chain to the last end.
- Chain a starting length to the width you want. This is the only measuring step. A small gauge swatch tells you how many stitches you get per inch, which you can multiply by your target width. If that feels fussy on a first project, just chain to roughly the width you want, lay it across a lap or a crib to check, and add or remove a few chains. Our gauge calculator does the math if you would rather be precise. For a baby blanket in worsted, you are usually somewhere around 100 to 120 chains.
- Work your first row into the chain. Skip the first chain or two (your chosen stitch will tell you how many), then work your stitch into each chain across. At the end you will have your foundation row, and its stitch count is the number you will hold to for the whole blanket.
- Turn, chain up, and repeat. At the end of every row, make one turning chain to lift your yarn to the height of the next row, turn the work, and stitch back across. That is the entire rhythm of a blanket: one row, turn, one row, turn. Half double crochet usually wants a turning chain of one or two depending on the pattern, and being consistent matters more than the exact number.
- Keep going until it is as long as you want. This is the quiet middle of the project, and it is meant to be repetitive. Stop the moment the blanket is big enough. There is no rule that says it has to be a certain size.
- Fasten off and weave in your ends. Cut the yarn leaving a six-inch tail, pull it through the last loop to lock it, then thread it onto your yarn needle and weave it back through several stitches so it disappears. Do the same with the tail at the very beginning. Two ends, a few minutes, done.
That is a finished blanket. If you want full written patterns to follow with stitch counts already worked out, our collection of crochet blanket patterns sorts easy crochet blanket patterns by skill level.
Keeping your edges straight
The single most common beginner blanket problem is edges that drift. The blanket starts as a neat rectangle and slowly grows wider or narrower as the rows pile up, until the sides bow in or flare out. It happens to almost everyone, and it is entirely fixable.
The cause is almost always the same: you are gaining or losing a stitch at the start or end of a row without noticing. Either you skip the last stitch of the row, or you work an extra stitch into the turning chain, or you miss the first real stitch because the turning chain confused you. One stray stitch per row does not show up for a while, then suddenly the shape looks wrong.
Three habits keep your edges honest:
- Count your stitches every few rows. Compare the count to your foundation row. The moment the number changes, you know the drift started in the row you just worked, not twenty rows back, and you can fix it on the spot.
- Be consistent with the turning chain. Decide whether your turning chain counts as a stitch and whether you work into the first stitch or into the turning chain at the end, then do the same thing every single row. Consistency matters far more than which choice you make.
- Use a stitch marker in the first and last stitch of each row while you learn. A small marker clipped into the true first and last stitch shows you exactly where the row begins and ends, so you stop guessing. Once your hands know the edges, you can drop the markers.
Size, yarn, and how much
The biggest reason a first blanket never gets finished is that it was too big to begin with. A queen-size throw is thousands of stitches, and enthusiasm rarely survives the distance. Start smaller so the project actually reaches an end.
Two beginner-friendly sizes work well:
| Size | Rough dimensions | Why it suits a beginner | |---|---|---| | Baby blanket | About 30 by 40 inches | Finishes in a reasonable number of evenings, useful gift | | Lapghan | About 36 by 48 inches | Couch-sized comfort without the commitment of a full throw |
For yarn, use smooth worsted (UK aran) acrylic in a light, solid color on a 5.0 to 5.5 mm hook. A worsted baby blanket needs roughly 800 to 1000 yards, depending on your stitch and tension. Single crochet sits at the higher end because it packs more stitches into the same space; half double crochet and the granny stitch land lower.
Here is the part that saves real heartbreak: buy all of your yarn up front, and buy it in a single dye lot. The dye lot is a small number printed on the label, and skeins from different lots can vary just enough in shade that a seam shows a faint stripe in daylight. Estimate generously, round up, and buy an extra skein. Leftover yarn becomes a border or a future project. Running out two rows from the end, only to find the store is out of your lot, is the kind of small tragedy worth avoiding entirely.
Adding a simple border
A border is the secret weapon of the beginner blanket. A round or two of stitches worked around the whole edge tidies a wobbly outline, evens out the sides, and frames the piece so it looks finished and intentional. It genuinely hides a multitude of small sins.
The simplest border is a round of single crochet worked all the way around the blanket, with a few extra stitches at each corner so it lies flat instead of cupping. Even one round pulls a slightly uneven edge into line and gives the blanket a clean frame. If you want something a little prettier, a second round, or a simple shell or picot edge, dresses it up without much added difficulty. Our guide to blanket edging walks through several beginner-friendly borders with step-by-step photos, so you can match the finish to the look you want.
A border is also where a leftover skein earns its keep. Work the edge in a contrast color, a soft terracotta against a cream blanket, and the whole piece reads as a deliberate design choice rather than a first attempt.
Common mistakes and fixes
Nearly every beginner blanket runs into the same short list of problems. Here is each one with its fix.
Drifting edges
The rectangle slowly turns into a trapezoid because a stitch is being added or dropped at the edges. Count your stitches every few rows against your foundation count, and keep your turning chain consistent so the start and end of each row behave the same way every time. Catch the drift early and a quick re-count puts you right back on track.
Curling
If the blanket curls along the bottom or the sides, especially early on, do not panic. A little curl is normal while a piece is small, and for a blanket it usually relaxes once the project is large and weighty. A border tames most of it, and a gentle blocking, wetting the finished piece and pinning it flat to dry, settles the rest in natural fibers. Acrylic does not block as crisply, so for acrylic the answer is mostly a border plus the weight of the finished blanket itself.
Running out of yarn mid-project
This is the avoidable one. Buy enough yarn up front, in the same dye lot, and round your estimate up rather than down. A worsted baby blanket wants roughly 800 to 1000 yards, so buy to the top of that range with a spare skein in reserve. Leftovers are never wasted.
Choosing too big a project so it never finishes
The most common reason a first blanket lives forever in a bag. Start small, with a baby blanket or a lapghan, and let yourself feel the satisfaction of a finished object. A completed small blanket teaches you far more than an abandoned large one, and the next blanket can be as big as you like.
Frequently asked questions
What is the easiest crochet blanket for a beginner?
A simple half double crochet blanket worked back and forth in straight rows. It is one stitch repeated with a single turning chain at the end of each row, no shaping and no fit. Half double crochet grows faster than single crochet, lies fairly flat, and stays easy to count, which keeps your edges tidy.
What is the best stitch for a beginner crochet blanket?
Half double crochet is the strongest all-round choice. It is warm and squishy, works up faster than single crochet, and lies flatter, so it balances speed and a soft feel. Single crochet is simpler but slower and uses more yarn, while the granny stitch is fast and forgiving if you prefer an open, textured look.
How much yarn do I need for an easy crochet blanket?
A worsted weight (UK aran) baby blanket needs roughly 800 to 1000 yards, depending on your stitch and tension. Single crochet sits at the higher end because it packs in more stitches. Buy it all at once in a single dye lot, and round up by a skein so you never run out two rows from the end.
What size should a beginner crochet blanket be?
Start small so it actually finishes. A baby blanket around 30 by 40 inches or a lapghan around 36 by 48 inches gives you couch-sized comfort without the thousands of stitches a full throw demands. A completed small blanket teaches you more than an abandoned large one, and your next blanket can be any size.
Why does my crochet blanket keep getting wider or narrower?
You are gaining or losing a stitch at the edges, usually by skipping the last stitch of a row or working an extra one into the turning chain. Count your stitches every few rows against your starting count, keep the turning chain consistent, and clip a marker into the first and last stitch of each row while you learn.
Do I need a border on a beginner crochet blanket?
You do not need one, but it helps a lot. A round or two of single crochet around the edge evens out a wobbly outline, frames the blanket, and makes it look finished. It hides small inconsistencies and is an easy way to use a leftover skein, especially in a contrast color for a deliberate look.