Crochet for beginners, starting from nothing
Learning crochet for beginners is mostly one skill wearing different hats. You make a loop, you pull yarn through it, and you do that again. Everything else is a variation on that single move. The technique is not the hard part. The only real hurdle, the thing that makes early rows look lumpy and uneven, is tension: how tightly you hold the yarn so each stitch comes out the same size as the last. Tension does not come from a tutorial. It comes from your hands repeating the motion until they stop thinking about it, which happens faster than you expect.
This is a complete starting guide for someone who has never held a hook. By the end you will know exactly what to buy, what to do in your first hour, the four stitches that carry almost every pattern, the order to make your first projects in, and the three mistakes every beginner fixes early. If you want the wider picture first, our calm introduction to what crochet is covers where the craft comes from and how it differs from knitting.
We will keep it unhurried. The yarn is patient, and so is the learning.
What you need to start
The supply list for crochet is genuinely short. You do not need a kit, and most starter kits pad themselves with stitch markers, a hook organizer, and a row counter you will not touch for months. Here is the honest version.
- One hook, US size H (5.0 mm). This is the most forgiving size for a beginner. It pairs cleanly with the medium yarn below, and the stitches are big enough to see what your hands are doing. Aluminum and wood both work fine. Pick whichever feels nicer to hold, because you are going to hold it for a while.
- One ball of light worsted yarn, cotton or acrylic. Light worsted (UK: DK to aran) in a pale, solid color. Cream, oatmeal, or a soft sage all work. A light color shows each stitch clearly, which makes mistakes easy to spot and easy to fix. Cotton has no stretch and shows stitches crisply, so it is a great teacher. Acrylic is soft, cheap, and forgiving if you pull it out and start over. Either is a good first choice. Skip variegated yarn, skip black, and skip anything fuzzy for now, because all three hide your stitches.
- A pair of scissors. Any small sharp pair you already own.
- A yarn needle. A blunt large-eyed needle for sewing in the loose end when you finish. One needle, a dollar or two, done.
That is the entire list. Around five to seven dollars of yarn and a single hook will carry you through your first three or four projects. When you are ready to compare hook sizes across the US, UK, and metric systems, our crochet hook converter lines them up in one chart.
Your first hour: hook, yarn, and the foundation chain
Your first hour has three small jobs: hold the tools, make a slip knot, and chain. None of them require talent. They require a few quiet minutes.
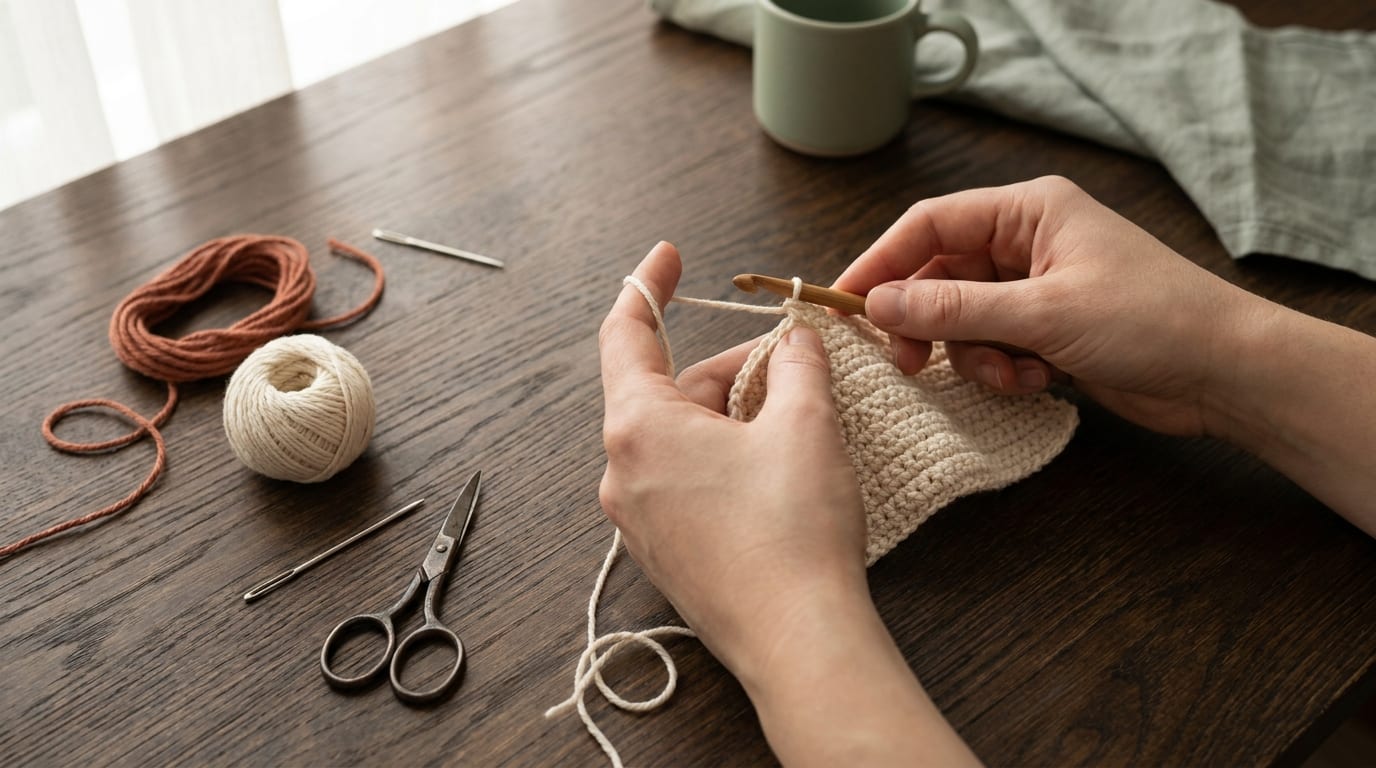
Holding the hook and the yarn
There are two common ways to hold a hook, and neither is wrong. The pencil hold has you grip the hook the way you hold a pencil, from above. The knife hold has you grip it from above with your palm over the top, the way you hold a butter knife. Try both for a minute each and keep the one your hand prefers. You can switch later.
The yarn is the part that feels strange at first. The working yarn (the strand leading to the ball) runs through the fingers of your other hand, which control how freely it feeds. A common method is to drape the yarn over your index finger, then weave it loosely through the rest of your fingers so there is a little gentle resistance. That resistance is your tension. Too loose and your stitches gape. Too tight and you fight the hook. You are aiming for somewhere in the middle, and you will find it by feel over the next few rows, not by getting it perfect now.
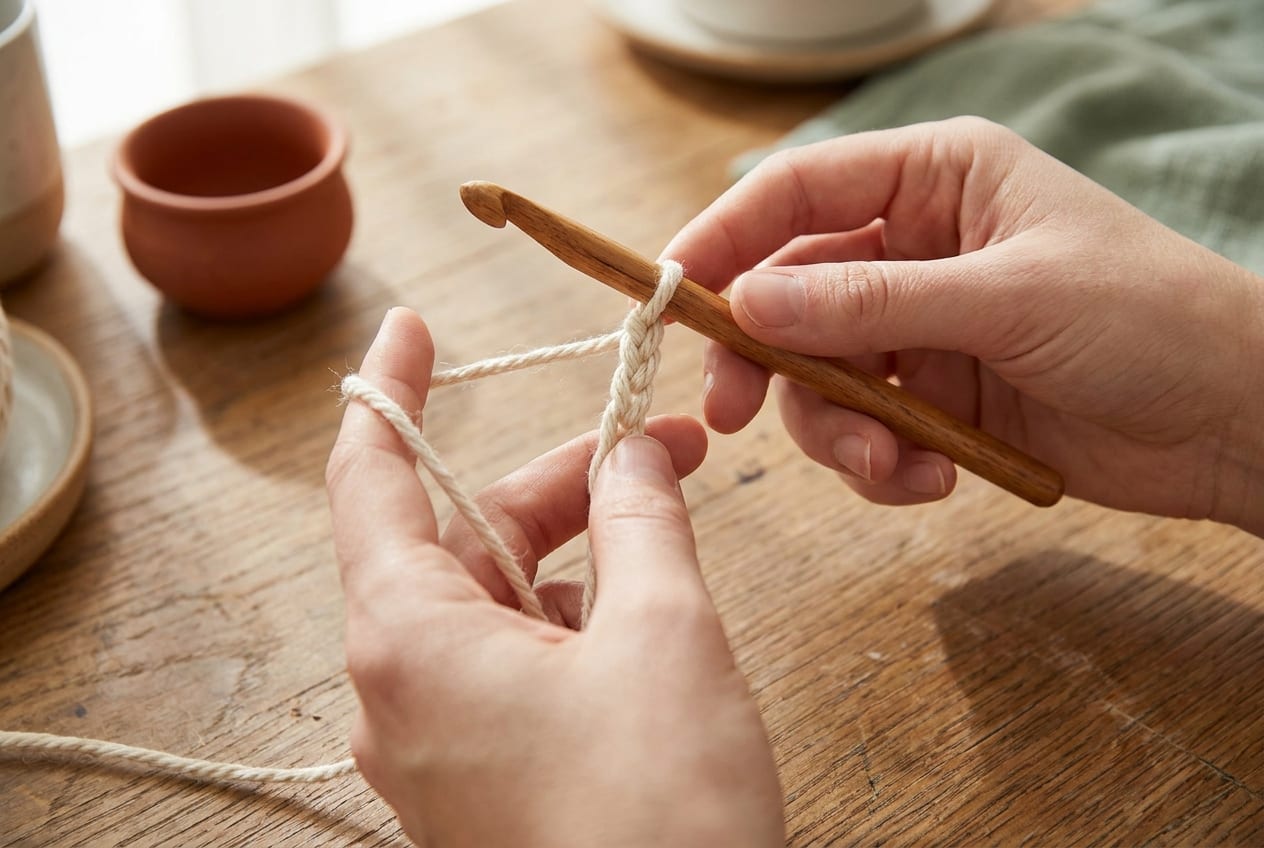
The slip knot
Every project begins with a slip knot on the hook. Make a loop with the yarn, leaving a short tail of a few inches. Reach the hook through the loop, catch the working yarn, and pull it through so a new loop sits on the hook. Tug the working yarn gently to snug it up, not tight. That loop on your hook is the start of everything.
The foundation chain
The chain is the base row that most flat projects are built on. With the slip knot on your hook, wrap the working yarn over the hook from back to front (this is called a yarn over), then pull that wrap through the loop already on the hook. You just made one chain. Do it again, and again. Each chain is a small V-shaped link, and a row of them is your foundation. Aim for fifteen or twenty to practice. Keep them loose and even. The chain is where most beginners grip too tight, so let your hand relax and let the loops sit a little roomy. Step-by-step photos of this exact stitch live on our chain page.
The first stitches to learn, in order
Four stitches carry almost every pattern labeled beginner or easy. Learn them in this order, because each one builds on the muscle memory of the one before.
1. Chain (ch)
You already met it above. The chain is the foundation, and it is also the small step you take at the start of most rows to lift your yarn up to the height of the next stitch. Get comfortable making a loose, even chain before anything else, because every project starts here. Full photos are on the chain page.
2. Single crochet (sc)
The shortest stitch with real height, and the workhorse of beginner crochet. Insert the hook into the next stitch, yarn over, pull up a loop (you now have two loops on the hook), yarn over again, and pull through both loops. That is one single crochet. It makes a tight, sturdy fabric, which is exactly what you want for dishcloths and stuffed toys. Worked back and forth, it teaches you straight edges faster than any other stitch. A note for UK readers: what the US calls single crochet, the UK calls double crochet, so always check which notation a pattern uses. The full walkthrough is on the single crochet page.
3. Double crochet (dc)
Twice the height of single crochet, and faster to build up. Yarn over first, then insert the hook into the next stitch, yarn over and pull up a loop (three loops on the hook), yarn over and pull through two, yarn over and pull through the last two. Double crochet makes a more open, drapey fabric, which is why most blankets, scarves, and garments lean on it. UK readers know this one as treble (tr). See the double crochet page for the step-by-step.
4. Slip stitch (sl st)
The shortest, flattest stitch, and the one you will use constantly without ever building a whole project from it. Insert the hook, yarn over, and pull through both the stitch and the loop on your hook in one motion. Slip stitches join the end of a round to the beginning, move your hook across a row without adding height, and tidy an edge. It is a connector more than a builder, but you will reach for it in nearly every project. The full crochet stitches library collects all four in one place with photos.
Your first projects, in order of difficulty
The right first project is small, repetitive, and finished before your enthusiasm fades. These four build on each other. Make them in order and you will have a quiet, solid foundation without ever feeling out of your depth.
A swatch
Before a project, make a swatch. Chain about fifteen, then single crochet back and forth for ten or twelve rows, and stop. A swatch is not a finished object, and that is the point: it has no stakes. You are just letting your hands learn the rhythm of insert, pull up, pull through, with nothing to ruin. Watch your edges and watch your stitch count. This is also where the idea of gauge starts to make sense, the relationship between your tension and the size of your fabric. When you are ready to measure it properly, our gauge calculator does the math. A swatch takes twenty minutes and saves you a hundred small frustrations later.
A dishcloth
The most honest first project in crochet. A cotton dishcloth is just single crochet worked back and forth into a square, and it drills the two things that trip up every beginner: keeping your edges straight and counting your stitches. Chain about thirty to thirty-five to set the width, single crochet across, turn, and repeat until the piece is as tall as it is wide. Use worsted weight cotton, because it shows each stitch clearly and survives the dishwater later. You will need well under one skein, around fifty yards, and most people finish in an evening. When you fasten off, you will see exactly where your tension wandered, which is the whole lesson.
A granny square
This is the project that opens the door to blankets. A granny square is worked in rounds instead of rows, so it teaches you three new things at once: joining your chain into a ring, working clusters of double crochet into the spaces of the round below, and turning corners. A single square uses only a small amount of yarn, often under twenty-five yards, and takes well under an hour once the rhythm clicks. The reason it matters so much is multiplication. A blanket is just many granny squares stitched together, so the moment one square looks right, a blanket is suddenly within reach. Work one in cream and one in terracotta to watch how the rounds stack.
A scarf
Once a square feels easy, go long. A scarf is the same back-and-forth idea as the dishcloth, but it adds a taller stitch and the patience of a project that does not finish in one sitting. Use double crochet, or half double crochet (UK: half treble) for a softer, squishier fabric. Aim for roughly seven to eight inches wide and about sixty inches long, a comfortable wrap-once length for an adult. One skein of worsted weight yarn, around two hundred yards, covers it with a little to spare. Plan on a few evenings. By the time you reach the far end, your tension will have evened out on its own, and the difference between your first rows and your last will be plain to see. When you want a next step, our roundup of free crochet patterns sorts projects by skill level.
How to read a beginner pattern
Patterns are written in shorthand that looks like a foreign language at first, but the language is small and consistent. A typical beginner row might read:
Row 4: ch 1, sc in each st across, turn. (32 sts)
In plain English: chain one to lift up to the new row, single crochet into every stitch across the row, then turn your work to start the next row. The number in parentheses is the stitch count, what you should have when the row is finished. Count it. If your number does not match, the mistake is in this row, not three rows back, and catching it now saves the whole piece.
Two rules carry a beginner through almost any easy pattern. First, find the abbreviation key, usually near the top, and confirm whether the pattern is written in US or UK terms before you start. Second, count at the end of every row. That is most of it. When an abbreviation is new to you, the crochet stitches library has the step-by-step for each one, and you can browse projects by difficulty in our free crochet patterns collection. If you prefer symbols to written shorthand, you can sketch your own diagram with the free stitch chart maker, right in your browser.
Three beginner mistakes and the fix
Almost every beginner makes these three. They are easy to fix once you know what you are looking at.
A too-tight foundation chain
If your chain is so tight you can barely fit the hook in to work the first row, you gripped it too hard, which is the most common beginner habit. The fix is simple: make your foundation chain with a hook one size larger, then switch back to the H hook for the rest of the project. Some crocheters keep two hooks on the table for exactly this. A loose chain makes the whole first row easier and stops the bottom edge from pulling in.
Losing or gaining stitches at the edges
This is the one that turns a tidy rectangle into a lopsided trapezoid. It usually happens at the very start or end of a row. You either skip the last stitch by accident, or you work an extra stitch into the turning chain. By row twenty, the shape has quietly drifted. The fix is to count at the end of every single row and compare to the pattern's stitch count. When the numbers stop matching, you know to look at the edge you just worked, not the whole piece.
Curling edges
If a flat project curls along the bottom or the sides, the foundation chain was probably too tight, or your tension shifted as you went. Single crochet curls more than double crochet, so a dense fabric is more prone to it. For natural fibers like cotton and wool, blocking fixes most of it: wet the finished piece, pin it flat to the shape you want, and let it dry. Acrylic does not block reliably, so for acrylic the answer is prevention, meaning a looser foundation chain and steady tension from the start.
A short, kind practice plan
You do not need to practice for an hour a day. You need to practice a little, often, with no pressure to be good yet. Here is a gentle four-week plan that ends with real finished objects rather than practice swatches.
- Week 1. Slip knot, foundation chain, and single crochet. Make one practice swatch and nothing else. Let your hands get bored of the motion. Boredom is the sound of progress here.
- Week 2. A cotton dishcloth, start to finish. Count at the end of every row. Fasten off, sew in the end with your yarn needle, and keep the dishcloth even though it is imperfect. It is proof.
- Week 3. Learn double crochet and slip stitch, then make one granny square. The first round is the hard part. The rest is repetition.
- Week 4. Start a scarf. You will not finish it in a week, and that is fine. The goal is to live with a longer project and watch your tension settle as the rows pile up.
Be kind to your hands and to your expectations. Take breaks before they ache, sit with good light and decent posture, and pull out a row without guilt when it goes wrong. Every crocheter you admire made a great deal of wobbly fabric first. The wobble is not failure. It is the tuition.
Frequently asked questions
Is crochet hard to learn for a complete beginner?
No. Crochet is one of the more approachable yarn crafts because you only manage a single hook, and a dropped stitch rarely unravels the way knitting can. The genuinely tricky part is even tension, and that improves on its own with a few projects of practice rather than any special talent.
What is the easiest thing to crochet first?
A single crochet dishcloth in worsted cotton. It is just one stitch worked back and forth into a square, so it teaches straight edges and stitch counting without any shaping. It uses about fifty yards, finishes in an evening, and you get a useful object instead of a throwaway practice swatch.
What size crochet hook should a beginner use?
A US size H, which is 5.0 mm, is the most forgiving starting hook. It pairs cleanly with light worsted or worsted yarn, and the stitches are large enough to see clearly while your hands learn the motion. Aluminum and wooden hooks both work fine, so choose whichever feels comfortable.
How long does it take to learn to crochet?
Most beginners make a recognizable swatch in their first sitting and finish a small project within their first week. The foundation chain often takes about an hour to feel natural, and the four basic stitches usually click within a few projects. Even tension takes a little longer and arrives quietly with practice.
Should I learn crochet or knitting first?
Neither is harder, so start with whatever appeals to you. Many people find crochet a touch friendlier at the start because mistakes are easier to undo and you only handle one tool. They are separate crafts, though, so learning one is not a prerequisite for the other and you can pick up both over time.
Why does my crochet keep getting wider or narrower?
You are gaining or losing stitches at the edges, usually by skipping the last stitch of a row or adding an extra one into the turning chain. The fix is to count at the end of every row and compare to the pattern. When the numbers stop matching, check the edge you just worked.
Pinterest pin headlines (internal reference, strip before publish)
- A: "Crochet for Beginners: Everything You Need to Start"
- B: "How to Crochet for Beginners, Step by Step"
- C: "The Calm Beginner's Guide to Crochet"