What crochet gauge actually is
Crochet gauge is a count: how many stitches fit across 4 inches and how many rows fit in 4 inches of your crocheted fabric. Patterns list a target gauge in their materials section, something like "14 sc and 16 rows = 4 inches." That number tells you how the designer's work came out with their hands, their yarn, and their hook.
Your hands are not the same as the designer's hands. Even using the same hook and the same yarn, two crocheters can produce fabric at noticeably different sizes. One person holds yarn loosely and gets an airy fabric. Another grips tightly and gets dense, small stitches. Neither is wrong as a habit, but both can produce a sweater that comes out too big or too small if you skip the gauge check.
Gauge is the bridge between a pattern's stated dimensions and what your hands will actually make. Once you understand it, you have control over your finished size.
When gauge really matters
Gauge is not an equal-stakes concern for every project. It falls into two clear categories.
Projects where gauge is critical: anything that needs to fit a body or a fixed measurement. Sweaters, cardigans, hats, mittens, socks, fitted bags, baby clothes. An inch of difference in gauge across a sweater front can add or remove 2 to 3 inches of width by the time you reach the armhole. That is the difference between a sweater that fits and one that goes in a drawer.
Projects where gauge is relaxed: anything that does not have a fit requirement. Blankets, scarves, dishcloths, shawls, stuffed animals, plant hangers, wall hangings. If your blanket comes out 52 inches wide instead of 48 inches, that is a bonus. Nobody is measuring your dishcloth. For these projects, you can match the yarn weight and hook size generally and start without a formal swatch.
How to make a gauge swatch
A gauge swatch is a small practice piece you make before starting your project. It takes fifteen minutes and can save you hours of ripping back a finished sweater.
Step 1: Set up the same way as your project. Use the exact yarn called for in the pattern, or your substitution yarn if you're swapping. Use the hook size the pattern recommends as a starting point. Crochet in the same stitch the pattern uses for the main fabric. If the pattern is worked in double crochet, swatch in double crochet.
Step 2: Make a swatch larger than 4 inches. Chain enough to produce at least 6 inches of width. Work rows until you have at least 6 inches of height. This gives you a buffer so you can measure from the center of the swatch, away from the edges. Edge stitches often have slightly different tension than the middle of a row.
Step 3: Fasten off and let the swatch settle. Remove it from your hook, weave in the ends, and lay it flat on a hard surface for a few minutes. Fabric under tension on the hook can look different from fabric at rest.
Step 4: Block if the pattern calls for it. If you are making a garment in wool or cotton and the pattern says to block, wet-block or steam your swatch before measuring. Some natural fibers relax by a full stitch or more per 4 inches after blocking. Measuring an unblocked swatch when your finished project will be blocked gives you misleading numbers.
How to count stitches and rows
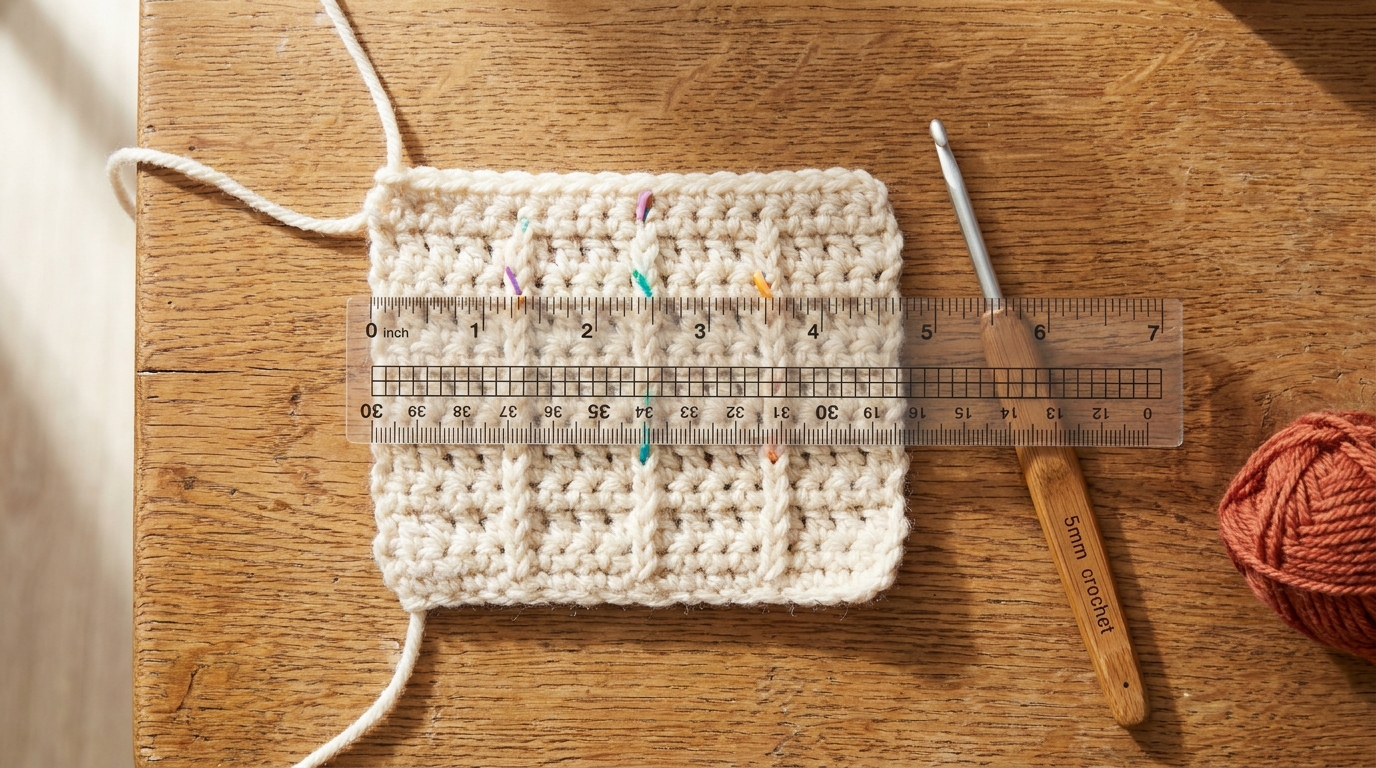
Lay your settled swatch on a flat, firm surface. Place a ruler or measuring tape horizontally across the swatch, somewhere in the middle third of the piece where tension is most even.
Counting stitches (width): Mark the spot where your ruler shows 0 with a pin or a stitch marker. Count every complete stitch moving right until you reach 4 inches, then mark that spot. The number of complete stitches between your two marks is your stitch gauge. Half stitches count, so write it precisely: "14.5 sc per 4 inches."
Counting rows (height): Rotate your swatch or reposition your ruler vertically. Mark 0 at a row edge, count complete rows upward to 4 inches, and mark that spot. The rows between your marks is your row gauge.
Write both numbers down. Compare them to the pattern's stated gauge.
What to do when your gauge is off
If your numbers do not match the pattern exactly, you have a straightforward fix. You do not change how you crochet. You change your hook size.
Too many stitches per 4 inches: Your stitches are smaller than the pattern expects. Your tension is tighter than the designer's. Move to a hook that is half a size or one full size larger. A 5 mm hook becoming a 5.5 mm hook is a typical adjustment. Then swatch again.
Too few stitches per 4 inches: Your stitches are larger than the pattern expects. Your tension is looser. Move to a smaller hook. Go down half a size to one full size and re-swatch.
Off by a fraction: If you are 14 stitches per 4 inches and the pattern calls for 14, you are done. If you are 14.5 and the pattern calls for 14, it is worth trying one hook size down and seeing if you land at 14. For very long projects, small differences compound. An extra half stitch per 4 inches across a 20-inch sweater front adds up to more than 2 inches of unexpected width.
Row gauge is off but stitch gauge is right: Row gauge matters most for pieces where you work a set number of rows to hit a length, like a yoke or a sleeve. If row gauge is off and stitch gauge is right, you may be able to compensate by working more or fewer rows than the pattern states, rather than changing your hook. Read the pattern to see whether it specifies rows or measurements. If it says "work until piece measures 8 inches," row gauge is less critical.
Keeping a gauge record
If you swatch regularly, it helps to keep a simple record. A small notebook or a notes app works fine. Write the yarn name, the hook size, the stitch used, and the gauge you got. Over time, you will notice your personal tendencies and know in advance roughly how your tension sits relative to average gauge charts.
The CrochetZen gauge calculator can also help you scale a pattern when your gauge differs from the stated gauge. You enter your gauge and the pattern's gauge, and it tells you how to adjust stitch counts to hit the same finished measurements.
A note on yarn substitutions
When you swap the pattern yarn for a different yarn, gauge checking becomes even more important. Two yarns labeled "worsted weight" can have meaningfully different yardage, fiber content, and thickness. Acrylic and wool behave differently. A tightly spun cotton can produce different gauge from a loosely spun cotton at the same weight. Always swatch your substitution yarn before you commit to a project.
If you want to go deeper on the foundational skills that context gauge, start with the crochet for beginners guide, which covers tension and basic technique from the ground up.
Gauge is a fifteen-minute investment
The most common reason beginner garments come out the wrong size is skipping the swatch. It feels like extra work before the real work, but it costs far less time than finishing a sweater, trying it on, and discovering it fits your sofa rather than your body.
Make the swatch. Block it if needed. Measure from the center. Adjust your hook. Swatch again if necessary. By the time you cast on for real, you will know exactly where you stand.
The gauge calculator tool lets you enter your actual gauge and the pattern gauge to get adjusted stitch counts automatically. No math required.