Amigurumi for beginners, from the first stitch
Amigurumi for beginners sounds harder than it is. A little crocheted animal looks like a hundred clever tricks, but it is really five small techniques repeated in a calm loop. You start a ring, you work one short stitch around and around, you add stitches to grow the shape, you take stitches away to close it, and you stuff it before you sew it shut. That is the whole craft. Once those five moves live in your hands, every pattern you pick up is just a new arrangement of them.
This is a step by step guide for someone who has held a hook a few times and wants to make their first stuffed toy. By the end you will know exactly what to gather, the five core techniques in order, how to read the shorthand in an amigurumi pattern, and how to crochet a simple ball or round animal from the first stitch to the last. If crochet itself is brand new to you, start with our calm guide to crochet for beginners and come back here once a single crochet feels familiar. For the wider picture of the craft, what is amigurumi covers where it comes from and why the stitches are so dense.
We will keep it unhurried. The yarn is patient, and a wonky first try is still a friend you made yourself.
What you need to start
The supply list for amigurumi is short, and a few of the choices matter more than they look. Here is the honest version.
- Yarn in a smooth, light color. Cotton or a smooth worsted (UK: aran) is the easiest first choice. A light, solid color shows each stitch clearly, which matters more in amigurumi than almost anywhere else, because you work in a tight spiral and need to see where the next stitch goes. Skip anything fuzzy and skip very dark colors for now, since both hide your stitches and make a first project frustrating. When you want to compare fibers properly, our notes on yarn for amigurumi go deeper.
- A hook one to two sizes smaller than the label says. This is the rule that surprises most beginners. If your yarn band suggests a 5.0 mm hook, reach for a 3.5 mm or 4.0 mm instead. A smaller hook makes a denser fabric with tiny gaps, so the stuffing cannot peek through. A normal hook gives you a soft, gappy fabric that looks tired the moment it is stuffed.
- A stitch marker. A locking marker, a safety pin, or even a scrap of contrasting yarn. You will move it up every round, and it is the single thing that keeps you from getting lost.
- Polyester fiberfill stuffing. A small bag goes a long way. This is the soft toy stuffing sold in any craft shop.
- Safety eyes, or embroidery thread. Safety eyes are plastic eyes with a washer that locks on the back. For a baby's toy you skip these and embroider the eyes with yarn instead, which we will come back to.
- A yarn needle. A blunt, large-eyed needle for closing the last round and sewing parts together.
That is the whole kit. A single ball of cotton and one hook will carry you through your first few toys.
The five core techniques, in order
Almost every amigurumi is built from these five moves. You already know one of them if you have made a dishcloth. Learn the rest in this order, because each one leans on the one before.
1. The magic ring
Amigurumi starts with a magic ring, an adjustable loop you crochet into and then pull tight, so the center closes with no hole. This is the one technique worth learning slowly and on its own, so we have a dedicated walkthrough with photos: the magic ring tutorial covers it stitch by stitch. The short version is that you make a loop of yarn, work your first round of stitches into that loop, and then tug the loose tail to cinch the center shut. A closed center is what gives amigurumi its clean, hole-free start.
2. Single crochet in a continuous spiral
The body of nearly every amigurumi is single crochet (US sc, which the UK calls double crochet). Insert the hook into the next stitch, yarn over, pull up a loop so you have two loops on the hook, yarn over again, and pull through both. That is one single crochet. The full motion lives on our single crochet stitch page if you want to see each step.
The twist in amigurumi is that you do not join each round. You work in a continuous spiral, rolling straight from the last stitch of one round into the first stitch of the next, with no slip stitch and no turning chain. A spiral has no seam, which is exactly what you want for a smooth toy. It also means there is no obvious line telling you where a round begins, which is why the next tool matters so much.
3. The increase
An increase is how a flat disc grows into a sphere. To increase, you work two single crochets into one stitch. Patterns write this as inc. That is the entire move: instead of one sc in the next stitch, you make two, and the piece gains a stitch. A round full of increases grows the shape quickly. A round with increases spaced out grows it gently. Spacing the increases evenly is what keeps the curve smooth instead of lumpy.
4. The invisible decrease
A decrease is how you shrink the shape back down to close it. Beginners are often taught a standard sc2tog, but in amigurumi the neater choice is the invisible decrease, because it leaves almost no visible bump. Here is how it works: insert your hook into the front loop only of the next stitch, then into the front loop only of the stitch after that, so you have three loops on the hook. Now yarn over and pull through the first two loops, yarn over again and pull through the remaining two. Two stitches have become one, and from the front it nearly disappears. Patterns write this as dec. It is worth practicing a few times, because the difference between a tidy face and a bumpy one often comes down to this stitch.
5. Fasten off, close, and sew
When the body is done, you cut the yarn leaving a long tail, around eight to ten inches, and pull it through the last loop to fasten off. That long tail does two jobs. First, you thread it on the yarn needle and run it through the front loop of each remaining stitch around the final small opening, then pull it tight like a drawstring to close the hole. Second, the same tail, or a fresh length, is what you use to sew arms, ears, or other parts onto the body. Neat sewing is what turns a pile of crocheted shapes into a toy.
How to read an amigurumi pattern
Amigurumi patterns are written in a tight shorthand that looks like code at first. It is small, consistent, and once you can read four lines of it you can read almost any pattern. Here is the start of a real one, the top of a simple sphere:
R1: 6 sc in magic ring (6)
R2: inc in each st around (12)
R3: (sc, inc) x6 (18)
R4: (2 sc, inc) x6 (24)
Read it one piece at a time:
R1,R2and so on are round numbers. Amigurumi is worked in rounds, not rows.6 sc in magic ringmeans work six single crochets into the magic ring, then pull it closed.incis an increase, two single crochets in one stitch. Soinc in each st aroundmeans you increase in every stitch, doubling the count.- The brackets and
x6. A sequence in parentheses is repeated.(sc, inc) x6means work one single crochet, then an increase, and repeat that pair of moves six times around the round.(2 sc, inc) x6means two single crochets, then an increase, repeated six times. - The number in parentheses at the end is the stitch count for that round, what you should have when the round is finished. After
R3you should count 18 stitches. AfterR4, 24.
That final count is the most useful thing on the page. Count your stitches at the end of every round and compare. If your number does not match, the mistake is in the round you just worked, not three rounds back, so you can fix it before it cascades. A decrease round reads the same way in reverse, for example (2 sc, dec) x6 (18), which means two single crochets, then an invisible decrease, six times, shrinking the round from 24 down to 18.
That is genuinely most of the language. The rest is the same words in different combinations.
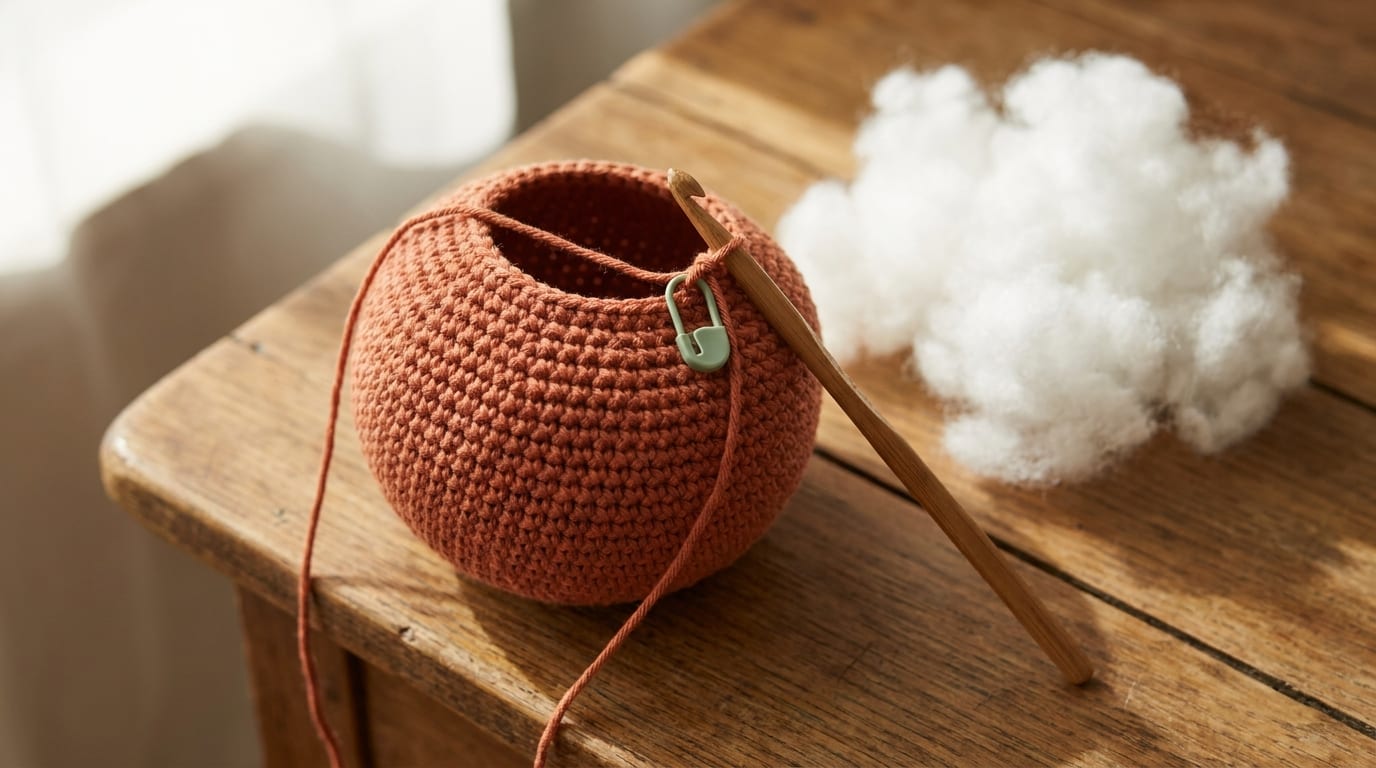
Making your first shape: a stuffed ball
A ball, or a simple round animal that is really just a ball with a face, is the perfect first amigurumi. A sphere has a clear logic you can feel: you increase to grow it, work a few even rounds through the middle, then decrease in a mirror image to close it, stuffing it firmly before the opening gets too small. Here is the shape, walked through.
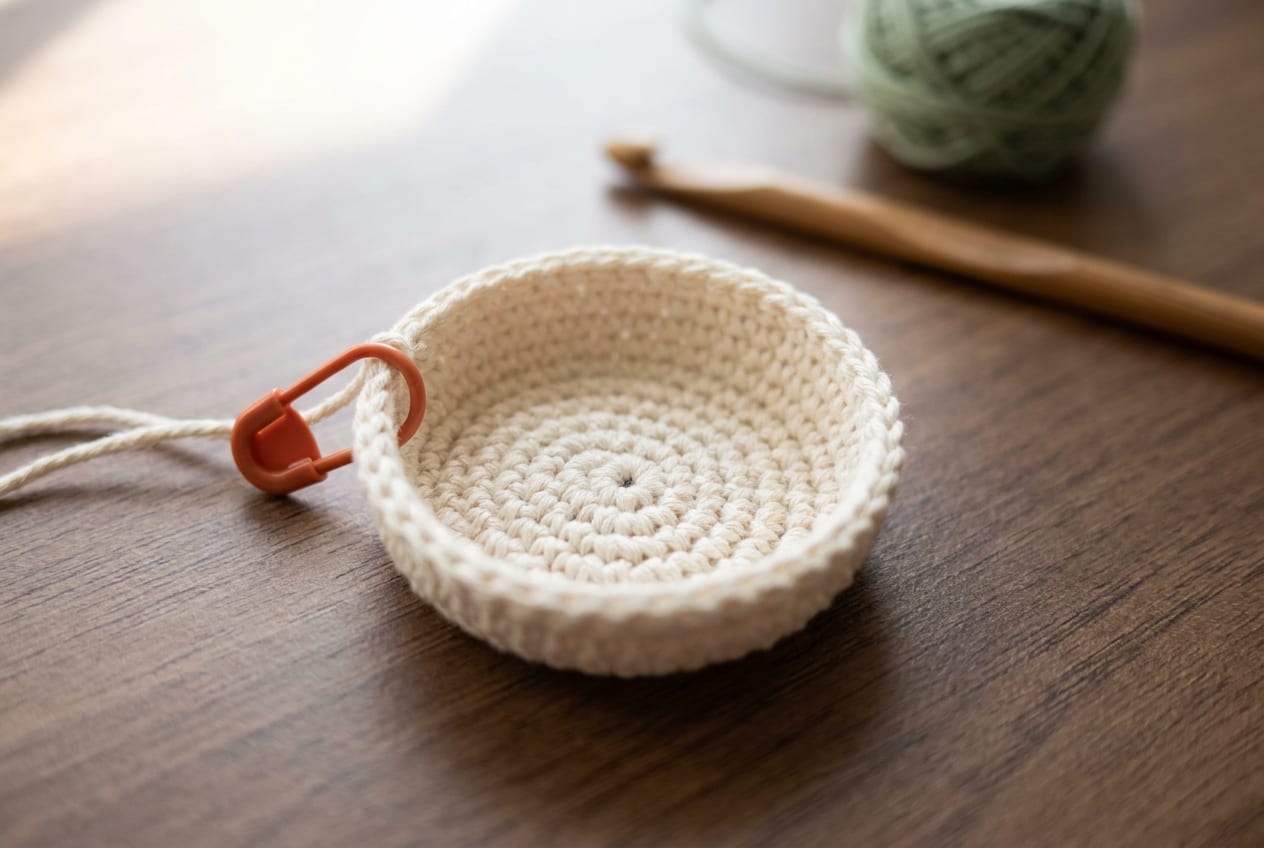
Grow the bottom. Start with the magic ring and work increase rounds, the same four rounds shown above and a couple more, each adding six stitches. The piece changes from a flat coin into a shallow bowl, then into the bottom half of a ball. The exact pattern you follow will tell you how many increase rounds to make for the size you want.
Work the even middle. Once the disc is as wide as you want the ball, you stop increasing and work several rounds of plain single crochet, one sc in each stitch, with no shaping at all. The stitch count stays the same, and the straight walls of the sphere build up. This even band is the widest part of the toy.
Place the eyes now. If you are using safety eyes, this is the moment, while there is still a wide opening to reach a hand inside. Push the post of each eye through a gap between stitches from the front, then press the washer onto the post from the inside until it clicks. Safety eyes go in before you stuff and before you close, because once both of those are done you cannot reach the back of the fabric. Look at the placement from the front and adjust before you commit, because the washer does not come off easily.
Decrease to close, and stuff as you go. Now you mirror the increases with decrease rounds, working dec at regular intervals so the top of the ball curves inward, the same way the bottom curved out. As the opening narrows, stop and stuff. Push small amounts of fiberfill in at a time and shape it with the blunt end of your hook or a finger, until the ball feels firm and holds its round shape. Then keep decreasing until only a small hole remains.
Finish. Fasten off with a long tail, thread it on the yarn needle, run it through the front loops of the last few stitches, and pull tight to close the hole. Weave the tail back into the body to hide it. You have made an amigurumi.
For a round animal, the body is the same ball. You then crochet small separate pieces, ears or a snout or little arms, each its own tiny spiral, and sew them on with the yarn needle. When you want a full written pattern to follow rather than a shape to improvise, our amigurumi patterns collection has projects sorted by difficulty.
Finishing well: stuffing, eyes, and sewing
The finishing is where a good first toy is won or lost, so it is worth slowing down for.
Stuff firmly, but not to bursting. Understuffing is the most common reason a first amigurumi looks sad and saggy, so use more than feels natural. The limit is when the stitches start to splay open and you can see the white fiberfill grinning through the gaps. Firm and smooth is the target, not hard and straining. Add the stuffing in small pinches and shape as you go, rather than cramming one big lump in at the end.
Eyes, and a note on safety. Safety eyes give a crisp, professional look and lock on permanently, which is exactly why they are not safe for the very young.
Sewing on parts. Pin each piece in place first and look at it from a step back before you commit a single stitch, because placement is what gives a toy its personality. Sew with the long tail you left, taking small stitches that catch the body fabric and the edge of the part alternately, and work all the way around so the piece is held flat and firm. Weave the end into the body to bury it.
Common beginner mistakes and the fix
Almost every new amigurumi maker hits these. Each one has a simple fix.
- Tension too loose, so stuffing shows. If you can see fiberfill through the fabric, your stitches are too open. The fix is to drop a hook size, sometimes two. A denser fabric is the whole point of sizing the hook down.
- Losing track of the round start. A spiral hides where each round begins, so without a marker you will miscount and your increases will drift. The fix is to mark the first stitch of every round and move the marker up each time.
- Miscounting stitches. It is easy to work an extra
scor skip one, especially around an increase. The fix is the stitch count at the end of each round. Compare every round to the pattern and catch the error early. - Understuffing. A toy that looks limp and wrinkled is almost always under-stuffed. The fix is to add more fiberfill than feels right, stopping just before the stitches splay.
- Starting with fluffy or dark yarn. A fuzzy or very dark yarn hides your stitches, which makes counting and finding the next stitch genuinely hard. The fix is to choose a smooth, light, solid cotton for your first few toys and save the fancy yarn for later.
None of these are signs you chose the wrong hobby. They are the ordinary tuition of a craft worth learning, and every one of them gets easier by the second toy.
Frequently asked questions
Is amigurumi good for beginners?
Yes. Amigurumi uses just five core techniques, and once you can work a single crochet you are most of the way there. A first stuffed ball is small, repetitive, and finished in an evening or two, so it is a friendly entry into crochet rather than an advanced project.
What is the easiest amigurumi to make first?
A simple stuffed ball, or a round animal that is really a ball with a face. A sphere is just increase rounds, then a few even rounds, then matching decrease rounds, stuffed before you close it. It teaches every core technique without any tricky shaping.
What size hook should I use for amigurumi?
Use a hook one to two sizes smaller than your yarn label suggests. The smaller hook makes a dense fabric with tiny gaps, so the stuffing cannot peek through. If the band recommends a 5.0 mm hook, try a 3.5 mm or 4.0 mm instead for a firmer toy.
Why does amigurumi use a magic ring instead of a chain?
A magic ring is an adjustable loop you crochet into and then pull tight, which closes the center with no hole. A chain ring leaves a small gap that stuffing shows through. The magic ring gives amigurumi a clean, closed center, so it is worth learning early.
What does inc and dec mean in an amigurumi pattern?
An increase, written inc, means working two single crochets into one stitch to grow the shape. A decrease, written dec, means combining two stitches into one to shrink it. In amigurumi the invisible decrease, worked through the front loops, is neater than a standard sc2tog.
Can I make amigurumi safe for a baby?
Yes. Skip plastic safety eyes, which can pull loose and become a choking hazard, and embroider the eyes with yarn instead. Use a firmly stuffed toy with all parts sewn on securely, and choose a washable yarn so the finished toy can be cleaned.