What knitting in the round means
Flat knitting goes back and forth: you reach the end of a row, turn the work, and knit the other direction. Knitting in the round keeps going in one direction, spiraling continuously, so you are always on the same side of the fabric. The result is a seamless tube.
Seamless construction is one of the things that makes hats, socks, mittens, and sweater bodies so satisfying to knit. There are no side seams to sew up afterward, and the right side of the fabric faces you the whole time, which makes it easier to see your work as you go.
The learning curve is mostly about setup. Once your stitches are joined and you are past the first round, knitting in the round feels almost identical to flat knitting, just without the turning.
Before reading on, it helps to be comfortable with the knitting for beginners fundamentals and to understand circular knitting needles, which you will need for most of these methods.
The three main methods
There are three practical ways to knit in the round. Each works well for certain project sizes. You do not need to learn all three at once -- magic loop covers most situations a beginner will encounter.
Magic loop
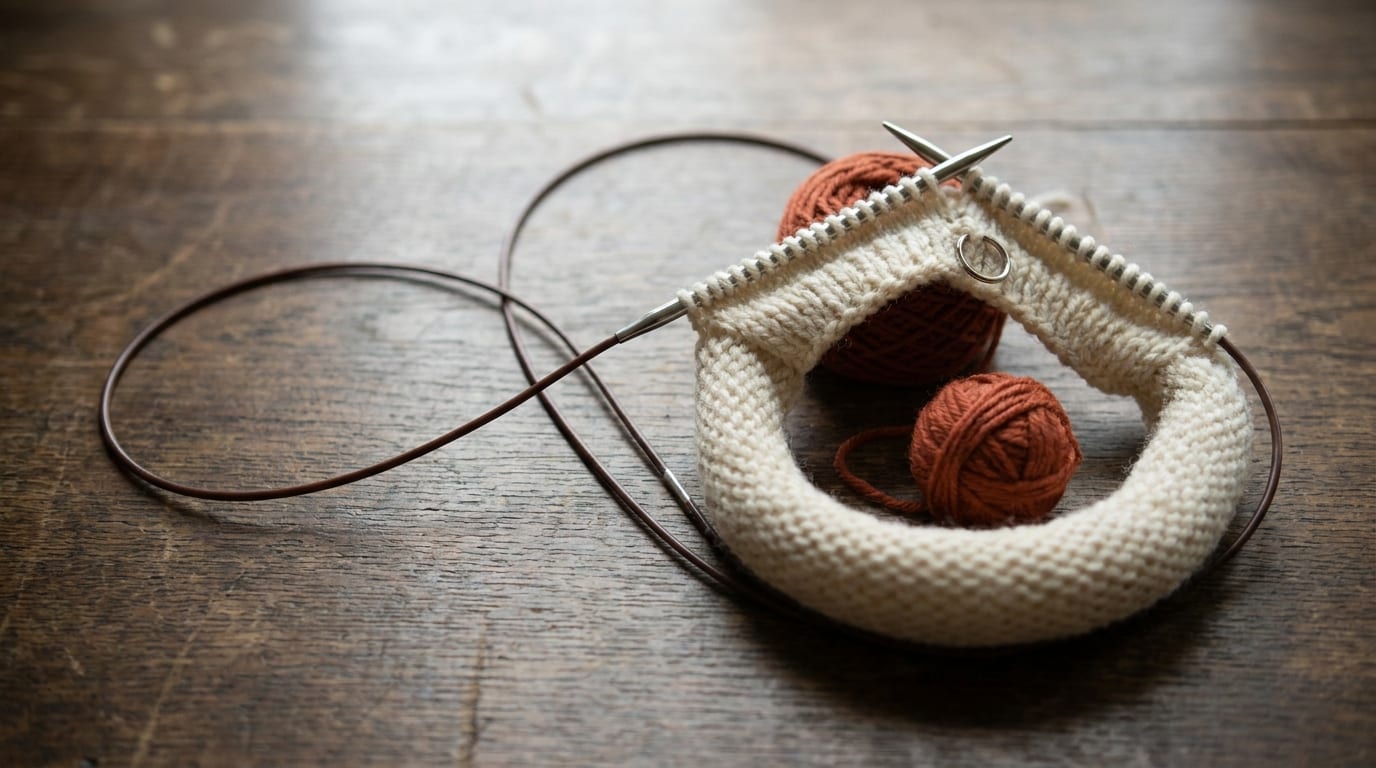
The magic loop uses a single long circular needle, typically 40 inches (100 cm) or longer. You divide your cast-on stitches into two equal groups, pull a large loop of cable out at the midpoint between the groups, and knit back and forth between the two needle tips.
It sounds complicated but the mechanics are simple. Half the stitches sit on each needle tip. You knit across one half, rotate the work, pull out a new loop, and knit across the other half. Once you have done it for a few rounds, it becomes automatic.
Magic loop works for any circumference, which makes it versatile. Sleeves, socks, hat bodies, mittens -- one needle length handles all of them. Many knitters settle on magic loop as their permanent method for small-circumference knitting and never feel the need to learn DPNs.
Two circulars
The two-circulars method divides your stitches between two separate circular needles of the same size. Each needle holds roughly half the stitches. You knit across the stitches on needle one using its other tip, then rotate the work and do the same with needle two.
This method produces the same result as magic loop but some knitters find it easier to keep track of because the two sets of stitches are physically separated. It does mean carrying two needles rather than one.
Two circulars is a good option if you own two circulars of the right size and do not yet have a long cable for magic loop. It is not widely taught first, but it works reliably once you understand how the two needles hand off stitches to each other.
Double-pointed needles (DPNs)
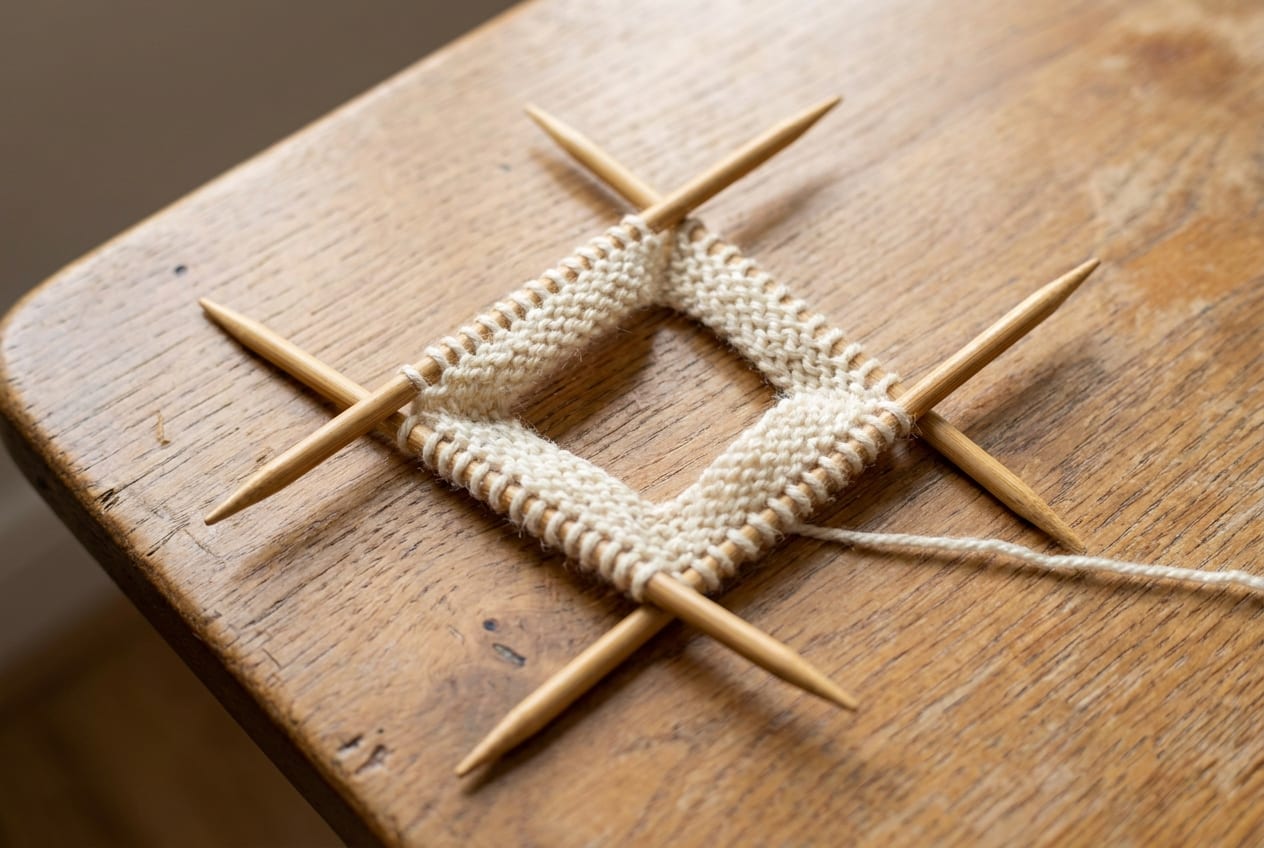
Double-pointed needles are short needles (usually 5 to 8 inches) with a point at each end. You cast on all your stitches and distribute them across three or four DPNs, creating a rough triangle or square of needles. A fifth needle is used to knit.
You knit across all the stitches on one needle, emptying it. That empty needle then becomes the working needle for the next group. The stitches rotate around the set of DPNs as you work.
DPNs are the traditional method for socks and are particularly useful for the decreases at the crown of a hat, where the circumference shrinks too small even for magic loop. Many knitters find DPNs awkward at first because you are managing multiple needles at once. The stitches feel precarious before the work grows long enough to hold the needles steady.
If you want to try DPNs, a simple tube such as an i-cord is a low-stakes way to practice. Once you feel comfortable with the hand position, socks and mittens follow naturally.
How to join without twisting
Twisting when you join is the most common beginner mistake in circular knitting. If your cast-on stitches spiral around the needle before you join, every stitch you knit will be twisted and the fabric will spiral too. The only fix is to rip back to the cast on.
Here is how to join cleanly.
- Cast on your stitches as usual.
- Lay the needle down on a flat surface. Look along the length of the needle and check that all the cast-on bumps hang downward, pointing toward the table. No stitch should be flipped up or wrapped around the needle cable.
- Pick the needle up. Place a stitch marker on the right needle tip to mark the beginning of the round.
- Knit the very first cast-on stitch from the left needle tip. This joins the round.
That stitch marker is the boundary between the end of one round and the start of the next. Every time you reach it, you have completed one full round. Slip it from the left needle to the right needle and keep going.
Stockinette and other stitch patterns in the round
In flat knitting, achieving stockinette means alternating a knit row and a purl row. In the round, you are always facing the right side of the fabric, so knitting every round produces stockinette automatically. This is one reason many knitters find the round easier for smooth fabric.
Other stitch patterns shift in the round too.
Garter stitch in flat knitting means knitting every row. In the round, garter means alternating one knit round and one purl round, because you need the ridges to appear on both the public side and the private side.
Ribbing (such as k2, p2) works the same in the round as flat. Knit the knits and purl the purls as they face you.
Cables and lace generally follow the same rules as flat knitting, but because you are always on the right side, you may need to read every round as a right-side row even if the flat pattern has wrong-side rows. Many circular patterns rewrite these for you, but if you are adapting a flat pattern, that adjustment matters.
Reading flat patterns for the round
Many stitch patterns and older sweater patterns are written for flat knitting. Adapting them to work in the round requires one key change: every wrong-side row becomes its mirror image.
For stockinette, a wrong-side row is all purls. In the round, that row becomes all knits (because you are on the right side looking at the opposite face of what would have been the wrong side).
For more complex textures, work through each wrong-side row and reverse every stitch: knits become purls and purls become knits. This sounds laborious but for cables and simple textured patterns it is usually just a few substitutions.
Patterns written specifically for in-the-round knitting have already done this work. If you are new to circular knitting, start with a pattern written for circular needles before attempting to adapt a flat one.
Which method should you start with?
Start with magic loop if you have a 40-inch or longer circular needle. It handles almost everything a beginner will knit in the round: hats, mittens, simple socks, yoked sweaters. You will only need DPNs if you want to work very tight-circumference pieces or find magic loop uncomfortable.
If you already own DPNs, a hat worked on DPNs is a perfectly reasonable first round project. The stitches feel wobbly for the first inch and then the fabric holds the needles together naturally.
Two circulars is a good fallback if your only circulars are shorter than 40 inches. Two 24-inch needles can handle the same range of projects as one 40-inch needle with magic loop.
The method matters far less than the join. Get the join right -- no twisting, marker in place, first stitch connected -- and the rest of working in the round is ordinary knitting that just never turns around.
Common questions about knitting in the round
Can I use straight needles to knit in the round? No. Straight needles do not form a loop, so there is nowhere for the extra stitches to rest. You need either a circular needle (one or two) or double-pointed needles.
How do I know what size circular needle to use? The needle diameter (US size) should match what the pattern specifies for gauge. The cable length should be shorter than the circumference you are knitting -- a 40-inch cable is too long for the crown of a hat, but magic loop solves that by folding the cable. See the circular knitting needles guide for a fuller breakdown of cable lengths for different projects.
Do I need to purl when knitting in the round? For plain stockinette, no. For ribbing, yes -- you purl the purl stitches as they face you. For garter stitch, you alternate knit and purl rounds. Purling in the round is the same motion as purling flat; you will still need it for many patterns.
What does it mean when a pattern says "place marker, join to work in the round"? This instruction appears right after the cast-on. You place a stitch marker on the right needle tip and then knit the first stitch, which closes the circle. From that point on you are working in rounds rather than rows.