What binding off actually does
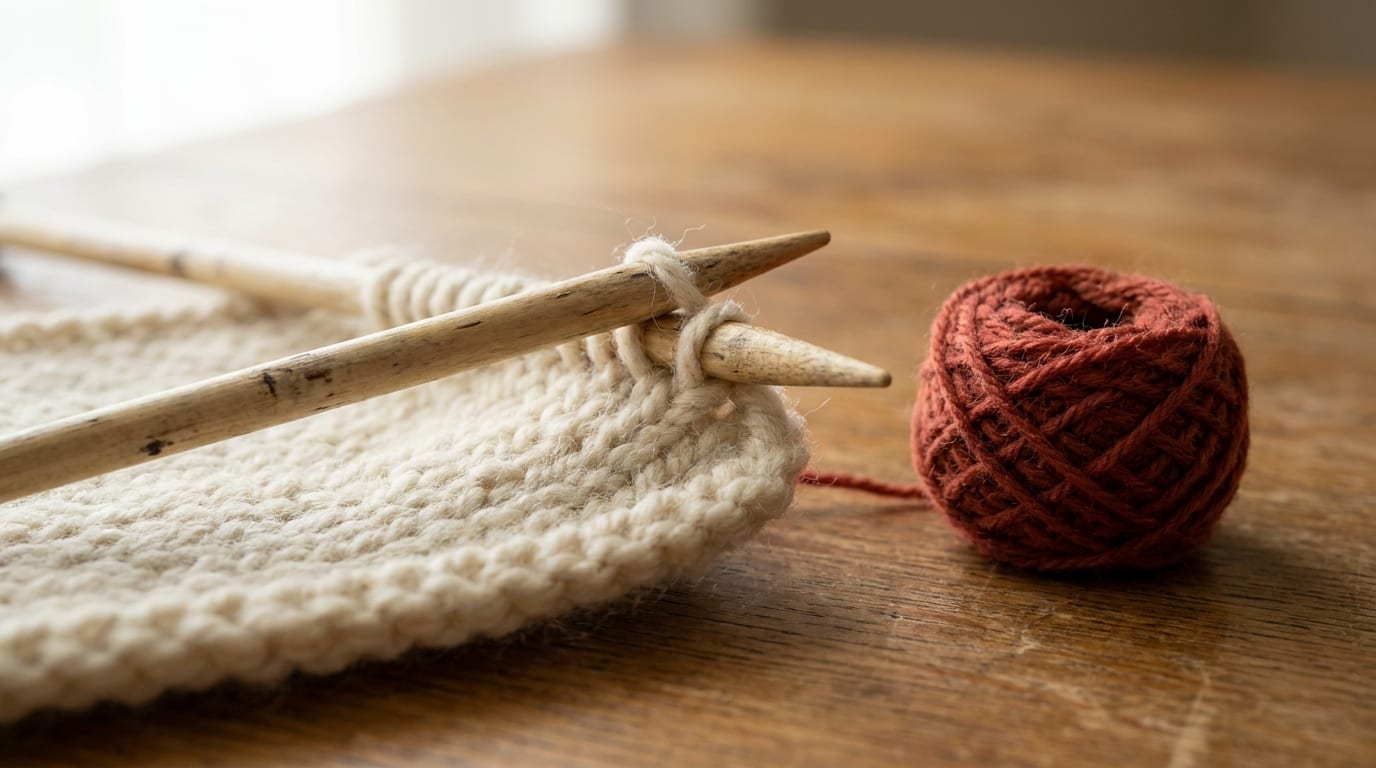
When you finish knitting a piece, the stitches on your needle are still live loops. If you just pull the needle out, every stitch can unravel. Binding off closes those loops permanently by passing each stitch over the next, creating a neat, secure final edge.
The bound-off edge is what you see at the top of a scarf, around a hat brim, or at the shoulder of a sweater. How you bind off determines whether that edge is stretchy, firm, or joined to another piece entirely.
If this is one of your first projects, you may want to revisit the knitting for beginners guide or read about how to cast on so you have the full picture of how a piece of knitting begins and ends.
Standard bind off: step by step
The standard bind off works for almost every situation. It produces a slightly firm, clean edge. Learn this one first.
- Knit two stitches. Work them normally so both sit on your right needle.
- Pass the first stitch over the second. Use the tip of your left needle to lift the right-most stitch on the right needle up and over the left-most stitch, dropping it off the needle entirely. You now have one stitch on the right needle.
- Knit one more stitch. You now have two stitches on the right needle again.
- Repeat: pass and knit. Keep passing the right stitch over the left, then knitting one new stitch from the left needle. Continue until you have worked every stitch and just one remains on the right needle.
- Cut the yarn and pull through. Cut the working yarn, leaving at least 6 inches. Pull that tail all the way through the last loop to lock it. Thread the tail on a yarn needle and weave it into the back of your work to hide it.
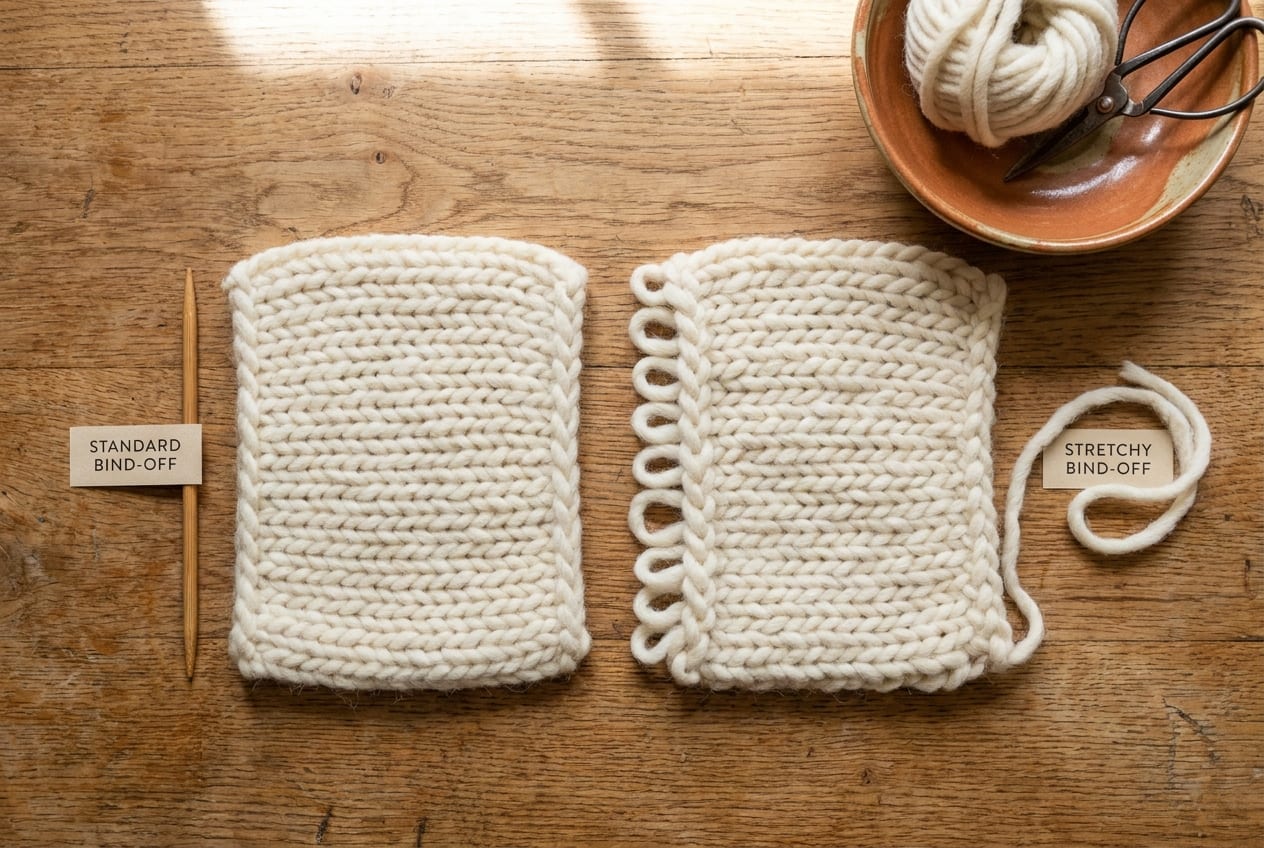
The result is a firm, tidy chain running along the top of your knitting.
The stretchy bind off
The stretchy bind off is the one to use for necklines, sock cuffs, lace edges, or anywhere the bound-off edge needs to stretch when worn. The standard bind off can restrict these edges so much they become difficult to pull over your head or foot.
There are several stretchy methods. This one is sometimes called the k1, k1, pass over bind off.
- Knit one stitch.
- Knit the next stitch.
- Pass the first stitch over the second, exactly like the standard bind off.
- Put the remaining stitch back onto the left needle by inserting the left needle tip through the front of the stitch from left to right.
- Knit two stitches again (the one you just put back, then the next stitch from the left needle).
- Repeat from step 3.
The extra step of returning the stitch to the left needle creates a slightly longer chain, which is what gives you the stretch. It sounds repetitive but finds a rhythm quickly.
Three-needle bind off: joining two pieces
The three-needle bind off does two things at once: it binds off and seams two pieces of knitting together. You end up with a clean, nearly invisible join on the inside. It is most often used at shoulder seams on sweaters or when closing the toe of a sock.
You need three needles for this: two holding your live stitches and one to work with. Both pieces should have the same number of stitches.
- Hold the two needles parallel in your left hand, with the right sides of the knitting facing each other (inside out).
- Insert the working needle (your third needle) into the first stitch on the front needle, then into the first stitch on the back needle simultaneously.
- Knit both stitches together as one, so one stitch lands on the working needle.
- Repeat with the next pair of stitches. You now have two stitches on the working needle.
- Pass the first stitch over the second, just like the standard bind off.
- Continue across the row, knitting one pair and passing over, until all stitches are bound off.
When you turn the work right side out, the seam is nearly invisible on the outside with a small ridge on the inside.
Common mistakes and how to fix them
The edge is too tight. This is the most frequent problem. Use a needle one or two sizes larger for the bind-off row. You do not need to start over -- just switch to the larger needle as you begin binding off.
The tail is too short to weave in. Leave at least 6 inches when you cut the yarn. If you already cut it too short, thread whatever length you have onto a yarn needle and weave it back and forth through several stitches. Even 3 inches can be secured this way.
You ran out of yarn mid-bind-off. Attach a new length of yarn by tying it loosely to the old end near the edge, continue binding off, and then weave both tails in after. The knot can be untied once both tails are woven in securely.
The last loop came undone. This happens if the tail was not pulled all the way through the final loop. Re-thread the tail on a yarn needle, bring it through the loop from the inside, and pull snug. Weave in as normal.
Choosing which bind off to use
Use the standard bind off for most flat knitting: scarves, blankets, dishcloths, and any edge that does not need to stretch. It is the fastest and tidiest for everyday use.
Use the stretchy bind off for necklines, armhole edges, sock cuffs, and any lace edge that needs to open up. A too-tight bind off on a neckline can make a sweater unwearable, so this is worth the extra step whenever stretch matters.
Use the three-needle bind off when you have two pieces with live stitches that need to be joined. It saves you the separate sewing step and produces a stronger join than hand-sewn mattress stitch.
Once you are comfortable binding off, you have both the start and the finish of knitting handled. The how to cast on guide is the other bookend if you have not read it yet.
Frequently asked questions
Do I bind off on the right side or wrong side? Bind off on whichever side the pattern specifies. If the pattern does not say, binding off on the right side (knit side of stockinette) usually produces a cleaner-looking edge. For ribbing, binding off in pattern -- knitting the knits and purling the purls -- keeps the edge matching the fabric.
Why is my bound-off edge wavy? A wavy bound-off edge is usually caused by uneven tension as you pass the stitches over. Try to use the same tension for every pass-over. Using a slightly larger needle often solves this too.
Can I undo a bind off? The standard bind off is not easy to undo because the chain locks each stitch in place. If you need to, you can pick at the chain with a knitting needle or scissors and pull out individual stitches, but it is slow and tedious. It is better to try a small tension swatch before binding off on a project you care about.