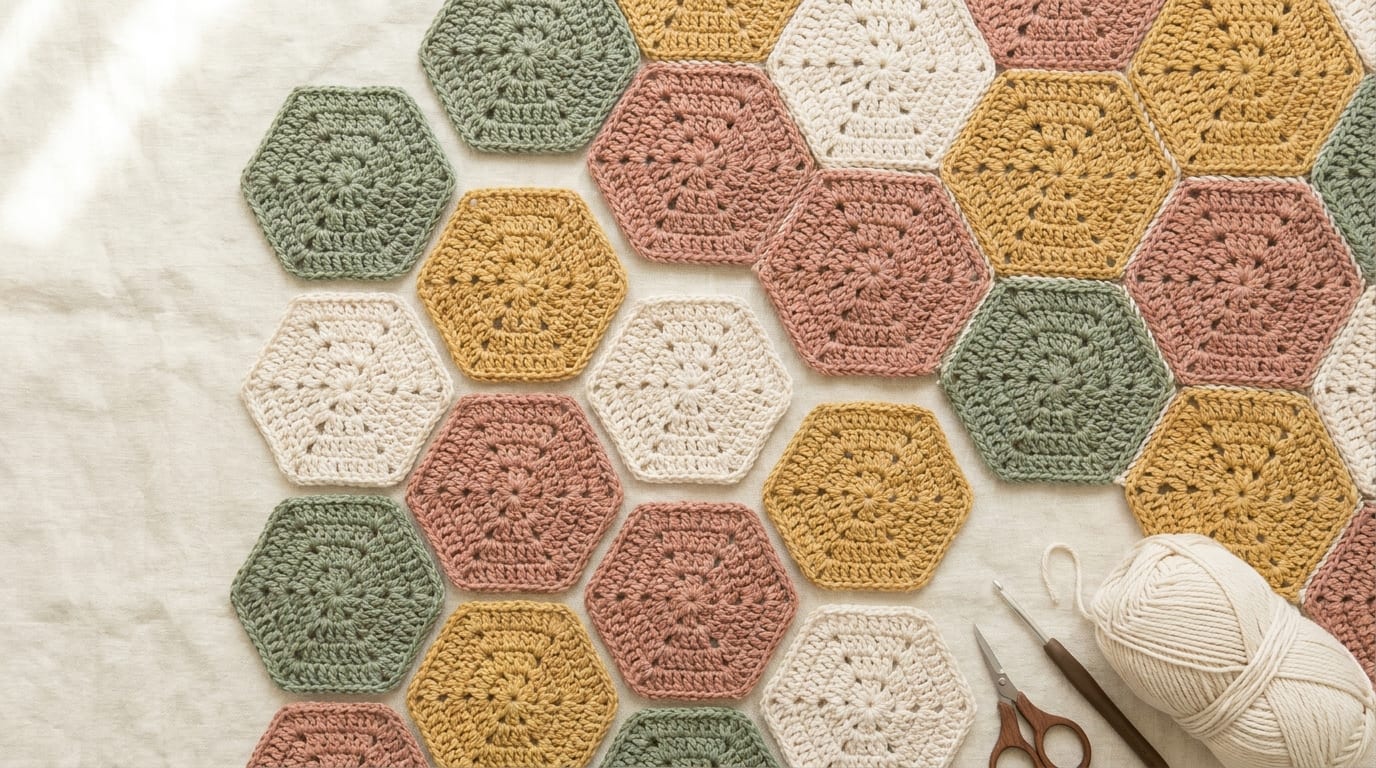
How hexagon granny squares differ from the classic
A classic granny square has 4 corners, 4 sides, and a symmetry that tiles easily on a simple grid. A hexagon granny square has 6 corners and 6 sides, which changes two important things: the shape of each motif and the way they fit together.
The construction logic is identical. You start from a center ring, work clusters of double crochets separated by chain spaces, and build outward in rounds. But instead of increasing at 4 corners, you increase at 6. The result is a shape that looks like a traditional honeycomb cell.
This six-fold symmetry means each round adds 6 cluster groups instead of 4. The corners are spaced 60 degrees apart instead of 90 degrees. Everything else about how you read and work the pattern follows the same rules as a standard granny square.
Abbreviations for this pattern
- ch — chain
- sl st — slip stitch
- sc — single crochet
- dc — double crochet
- sp — space
- ch-2 sp — chain-2 corner space
- rep — repeat
- MR — magic ring (or ch-4 joined into a ring)
Round-by-round hexagon granny pattern
This pattern makes a hexagon approximately 9 cm across after blocking, worked in worsted weight yarn with a 5mm hook.
Setup: Make a magic ring, or chain 4 and join with a sl st to form a ring.
Round 1:
Ch 3 (counts as first dc). Work 2 dc into the ring. Ch 2. [3 dc into ring, ch 2] five times. Join with sl st to top of beginning ch-3. (6 clusters of 3 dc, 6 ch-2 spaces)
This round establishes your 6 corner positions. The ch-2 spaces are your corners.
Round 2:
Sl st to first ch-2 sp. Ch 3. Work 2 dc, ch 2, 3 dc all into the same ch-2 sp (first corner made). Ch 1. [3 dc, ch 2, 3 dc into next ch-2 sp, ch 1] around. Join with sl st to top of beginning ch-3. (6 corners of [3 dc, ch 2, 3 dc], 6 ch-1 side spaces)
Round 3:
Sl st to first ch-2 sp. Ch 3. Work 2 dc, ch 2, 3 dc into same ch-2 sp (corner). Ch 1. 3 dc into next ch-1 sp (side cluster). Ch 1. [3 dc, ch 2, 3 dc into next ch-2 sp, ch 1, 3 dc into next ch-1 sp, ch 1] around. Join with sl st. (6 corners, 6 side clusters, 12 ch-1 spaces)
After Round 3 the hexagon shape is well established. Each subsequent round adds one more side cluster between each pair of corners.
Round 4 (optional, for a larger hexagon):
Sl st to ch-2 sp. Ch 3. 2 dc, ch 2, 3 dc in same sp (corner). Ch 1. [3 dc in ch-1 sp, ch 1] twice. [3 dc, ch 2, 3 dc in next ch-2 sp, ch 1, 3 dc in ch-1 sp, ch 1, 3 dc in ch-1 sp, ch 1] around. Join. (6 corners, 12 side clusters, 18 ch-1 spaces)
Fasten off at the end of your final round. Weave in ends.
How hexagons tile: the honeycomb layout
This is where hexagons require more planning than squares. Squares tile in a simple rectangular grid. Hexagons tile in offset rows, which creates a honeycomb structure.
In the honeycomb layout:
- Row 1 runs across with hexagons touching side to side.
- Row 2 is offset by half a hexagon width, so each hexagon in Row 2 sits in the gap between two hexagons in Row 1.
- The top of each Row 1 hexagon shares a side with the bottom-left and bottom-right of two different Row 2 hexagons.
This means each interior hexagon shares up to 6 sides with its 6 neighbors. But because of the offset, joining is done in a specific order to avoid awkward angles.
Joining order:
- Join all hexagons within each row horizontally first.
- Then join Row 2 to Row 1 by working down each shared side in sequence.
Gaps: The honeycomb layout creates small triangular gaps at the top and bottom edges of the blanket where the offset rows meet. You have two options:
- Fill the gaps with small triangle motifs crocheted to fit.
- Leave them as decorative negative space and add a simple border that squares off the edge.
Most beginners find leaving the gaps and adding a border simpler. The border just needs to travel around the zigzag edge, picking up stitches evenly and working enough extra stitches at each inward and outward point to keep the edge flat.
Joining methods for hexagons
The same joining methods that work for squares work for hexagons, with one adjustment: you are joining along 6 sides instead of 4, and the angles at corners are 120 degrees instead of 90 degrees.
Flat slip stitch join: Hold two hexagons right sides together. Slip stitch through corresponding ch-1 spaces and dc tops along one shared side. The corner ch-2 spaces are handled by working sl st through both corner spaces. This is the fastest method.
Join-as-you-go (JAYG): Works well for hexagons once the layout is planned. Work the final round of each new hexagon normally, but along any edge that borders a finished hexagon, replace the ch-1 spaces with sl sts into the corresponding spaces of the neighbor. The corners of shared edges get a ch-1, sl st, ch-1 instead of ch-2.
Whip stitch: Sew along each shared side with a yarn needle. Because hexagon sides are shorter than square sides, each individual seam takes less time, though you have more of them per hexagon.
Project ideas for hexagon granny squares
Blankets with the honeycomb layout are the most ambitious and most rewarding project. A lap blanket might use 40 to 60 hexagons depending on size. Plan the color arrangement first by placing all finished hexagons on the floor before joining.
Pillow covers made from 7 hexagons in the classic flower arrangement (1 center, 6 surrounding) produce a striking front panel. Back the hexagon panel with a solid piece of fabric or crochet a plain back panel.
Bags with hexagon sides and a simple strap have a structured geometric look. Join 6 hexagons in a strip for the body and sew or crochet the sides together.
Coasters and pot holders made from a single 4-round hexagon are quick gifts. Cotton yarn makes them practical and washable.
For the classic granny square pattern and techniques, see the how to crochet a granny square guide. For more granny square project ideas and layout inspiration, visit the granny square patterns collection.
Hexagon granny squares reward patience in the planning stage. Once you have a stack of blocked, consistent hexagons and a clear layout photograph, the joining goes smoothly and the honeycomb structure builds itself in a satisfying way.